راه اندازی DHCP Server بر روی Ubuntu 14.04
DHCP server is used to assign IP address to client computers and other Network devices . Basically we need Ipaddress, Subnet mask, Gateway and DNS for network settings . We need to define these values in the DHCP server, so that the client computer connected to that network gets values automatically from DHCP server.
This guide helps you to setup DHCP server on ubuntu 14.04.
Setup DHCP server on ubuntu 14.04
Before installation, Make sure you have assigned static IP to the server.
Step 1 » Issue the below command to update repository.
krizna@leela:~$ sudo apt-get update
Step 2 » Now install isc-dhcp-server package and dependencies.
krizna@leela:~$ sudo apt-get install isc-dhcp-server -y
Step 3 » After installing, open /etc/default/isc-dhcp-server file and assign interface.
krizna@leela:~$ sudo nano /etc/default/isc-dhcp-server

INTERFACES="eth0"
Step 4 » We need to define below values in dhcpd.conf file located in /etc/dhcp/directory.
Example scenario:
Network : 192.168.100.0/24
Range : 192.168.100.20 ( Starting IP ) – 192.168.100.100 ( Ending IP )
Gateway : 192.168.100.1
Primary DNS : 192.168.100.5
Sec DNS : 8.8.8.8

Take backup copy before making changes to the original file .Better rename the file and create a new one .
krizna@leela:~$ sudo mv /etc/dhcp/dhcpd.conf /etc/dhcp/dhcpd.conf.org
krizna@leela:~$ sudo nano /etc/dhcp/dhcpd.confand add the below code after making changes as per your network values.
|
1
2
3
4
5
6
7
8
9
10
11
12
13
14
15
16
17
18
19
|
# option definitions common to all supported networks…
default–lease–time 600;
max–lease–time 7200;
# If this DHCP server is the official DHCP server for the local
# network, the authoritative directive should be uncommented.
authoritative;
# Use this to send dhcp log messages to a different log file (you also
# have to hack syslog.conf to complete the redirection).
log–facility local7;
subnet 192.168.100.0 netmask 255.255.255.0 { #network
range 192.168.100.20 192.168.100.100; # Range
option domain–name–servers 192.168.100.5, 8.8.8.8; #Pri DNS , Sec DNS
option domain–name “krizna.com”; #Domain name
option routers 192.168.100.1; #Gateway
option broadcast–address 192.168.100.255; #Broadcast
default–lease–time 600;
max–lease–time 7200;
}
|
Step 5 » Now start/restart dhcp service using the below command.
krizna@leela:~$ sudo service isc-dhcp-server restart
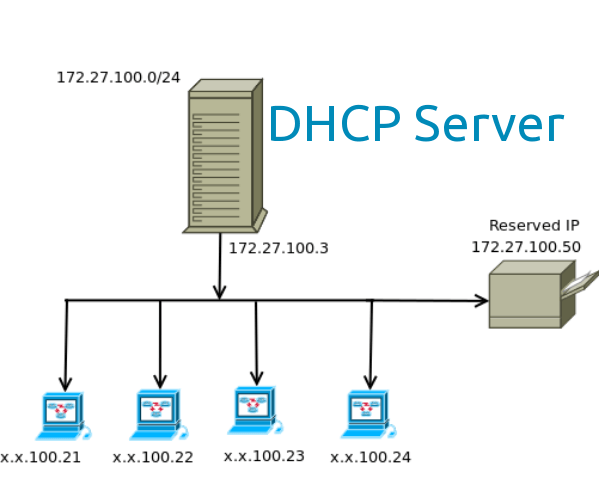
Address Reservation
Sometimes you need to reserve IP to some devices like printers, camera, linux machines etc.
In this case, first you need to find MAC Address of that device and define values in that particular subnet.
For example, Printer with 00:DD:HD:66:55:9B MAC Address has to be assigned with 192.168.100.50 IP. For this, you need to add code like below to that subnet.
|
1
2
3
4
5
6
7
8
9
10
11
12
|
subnet 192.168.100.0 netmask 255.255.255.0 { #network
– – – – –
max–lease–time 7200;
host printer–finance {
hardware ethernet 00:DD:HD:66:55:9B;
fixed–address 192.168.100.50;
}
host cam–gate {
hardware ethernet 00:KK:HD:44:55:22;
fixed–address 192.168.100.90;
}
}
|
and restart DHCP service.
krizna@leela:~$ sudo service isc-dhcp-server restart
That’s it . All the best
Troubleshooting and more config options