نصب و راه اندازی EMC ScaleIO بر روی vSphere
Since EMC’s purchase of ScaleIO in 2013, I have become very familiar with the product.
I was fortunate enough to go to deep dive training in November to become even more familiar with what it offers and where it may be going. While I was there, several of us had the opportunity to talk with product management about some things we’d like to see added/changed/etc.
Default Installation
From a high level, ScaleIO (formerly Elastic Converged Storage), runs natively in many Operating Systems and Hypervisors. Unfortunately ScaleIO doesn’t natively run in VMware vSphere. Because of this, a virtual storage appliance (VSA) must be used to present local storage to the ScaleIO cluster.
To install ScaleIO in vSphere, the process is (basically):
- Import an OVA (1st node) This is called the SVM or StorageVM
- Add storage to the 1st SVM
- Import the same OVA again, or clone it (2nd node)
- Add storage to the 2nd SVM
- Import the same OVA again, or clone it (3rd node)
- Add storage to the 3rd SVM
- Import/Clone any subsequent SVM/StorageVM
- Add storage to any subsequent SVM
- Power on each node & log into the console to assign one or more IP addresses
- Upload the ScaleIO binaries to the 1st node
- Either create a config file & let a python script deploy/configure each node’s role or load the binaries on each node and manually configure them
- Present storage to vSphere
- Use storage for VMs
That’s quite a few steps.
Jonas Rosland has this install process documented:
How to install ScaleIO in a VMware environment Part 1 – Part 2
I’ll add that I understand the folks at ScaleIO are in the process of automating this. I really like what I have seen.
In my lab
I stand up/tear down environments all the time (when I have time) in the lab. To be honest, most of the above steps are easy, provided I use the same IP addresses over and over, and I reuse my site.cfg over and over. So the process isn’t that long. But I like to automate.
After my first 100 or so installations, the installation process wasn’t so appealing to me. My biggest complaint? Entering IP addresses into each node before I get started. Take snapshots you say? Well, a best practice is to turn snapshots off on the StorageVM. Data is constantly changing and I have the vmx paramater snapshot.maxSnapshots=”0″ to ensure I cannot take snapshots of my StorageVM.
I then looked at what I could do to pass information from the import process to the VM before it was powered on. I am using vSphere with vCenter (Windows or Appliance Edition), so I can use OVF properties… Hmmm.
OVA Properties – Round 1
I imported the SVM that comes with ScaleIO 1.21 (latest shipping as of this post) but did not power it on. I increased my max snapshot count from 0 to 10, so I could play with some changes.
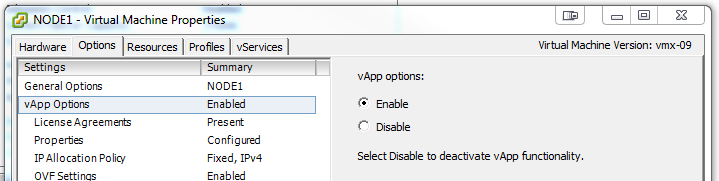
I edited the VM’s configuration from the legacy client and enabled the vApp options.
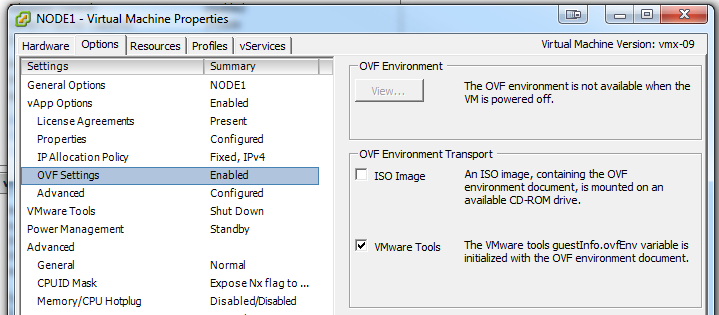
Then I enabled VMware Tools under the OVF Environment Transport section (This allows for information to be passed to the VM & access by VMware tools)
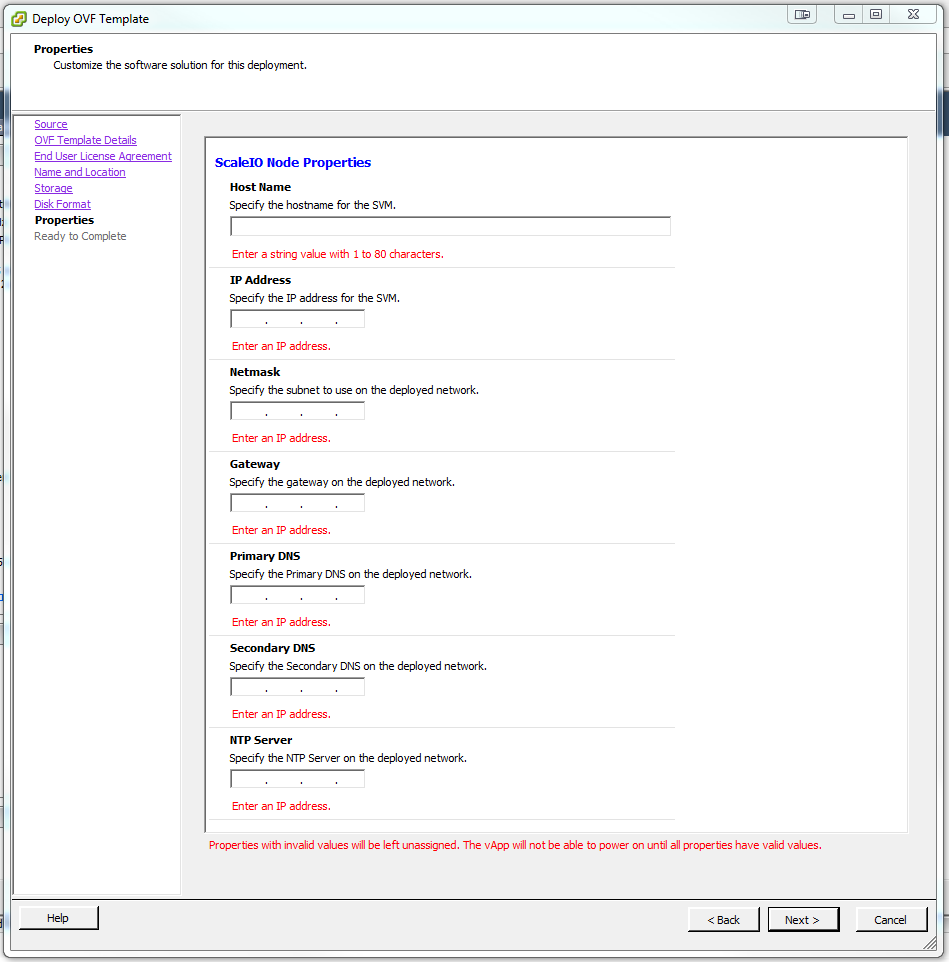
In the Advanced vApp Options, I added some ScaleIO specific information…
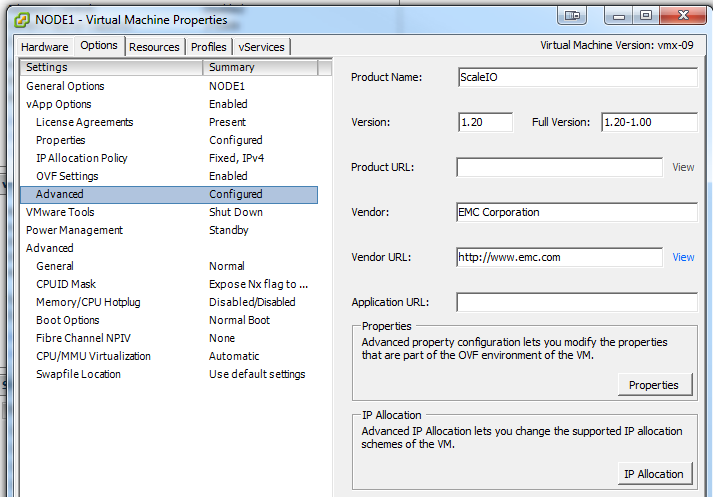
And added some additional properties, by selecting the Properties button in the Properties section
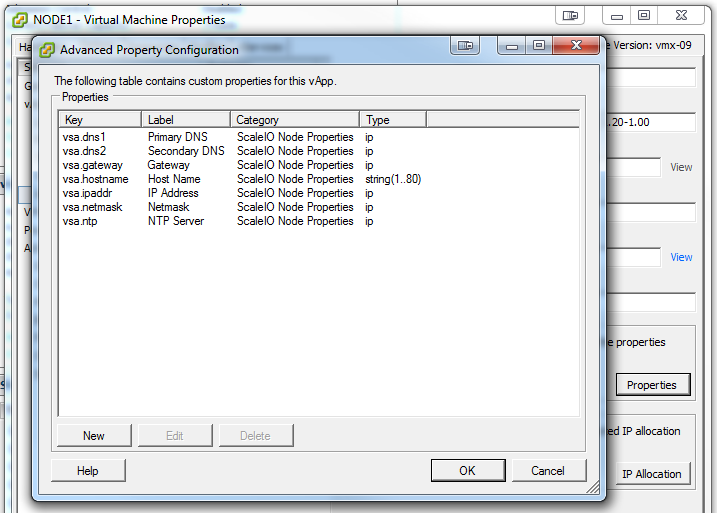
Selecting OK and closing the properties of the VM, I exported an OVF of the VM.
Some of the resulting XML included (formatted for clarity):
|
1
2
3
4
5
6
7
8
9
10
11
12
13
14
15
16
17
18
19
20
21
22
23
24
25
26
27
28
29
30
31
32
33
34
35
36
37
38
39
40
41
42
43
44
45
46
47
48
49
50
51
52
53
54
55
56
57
58
59
60
61
62
63
64
65
66
67
68
69
70
71
72
73
74
75
76
77
78
|
<VirtualSystem ovf:id="NODE1"> <Info>A virtual machine</Info> <Name>NODE1</Name></pre> ... <ProductSection ovf:class="vsa"> <Info>Information about the installed software</Info> <Product>ScaleIO</Product> <Vendor>EMC Corporation</Vendor> <Version>1.20</Version> <FullVersion>1.20-1.00</FullVersion> <Category>ScaleIO Node Properties</Category> <Property ovf:key="hostname" ovf:qualifiers="MinLen(1), MaxLen(80)" ovf:type="string" ovf:userConfigurable="true"> <Label>Host Name</Label> <Description>Specify the hostname for the SVM.</Description> </Property> <Property ovf:key="ipaddr" ovf:type="string" ovf:userConfigurable="true" vmw:qualifiers="Ip"> <Label>IP Address</Label> <Description>Specify the IP address for the SVM.</Description> </Property> <Property ovf:key="netmask" ovf:type="string" ovf:userConfigurable="true" vmw:qualifiers="Ip"> <Label>Netmask</Label> <Description>Specify the subnet to use on the deployed network.</Description> </Property> <Property ovf:key="gateway" ovf:type="string" ovf:userConfigurable="true" vmw:qualifiers="Ip"> <Label>Gateway</Label> <Description>Specify the gateway on the deployed network.</Description> </Property> <Property ovf:key="dns1" ovf:type="string" ovf:userConfigurable="true" vmw:qualifiers="Ip"> <Label>Primary DNS</Label> <Description>Specify the Primary DNS on the deployed network.</Description> </Property> <Property ovf:key="dns2" ovf:type="string" ovf:userConfigurable="true" vmw:qualifiers="Ip"> <Label>Secondary DNS</Label> <Description>Specify the Secondary DNS on the deployed network.</Description> </Property> <Property ovf:key="ntp" ovf:type="string" ovf:userConfigurable="true" vmw:qualifiers="Ip"> <Label>NTP Server</Label> <Description>Specify the NTP Server on the deployed network.</Description> </Property></ProductSection>...</VirtualSystem> |
I deleted the virtual disk (NODE1-disk1.vmdk) and pointed the OVF to the original vmdk (StorageVM_1.20-1.00-disk1.vmdk) and reimported my SVM.
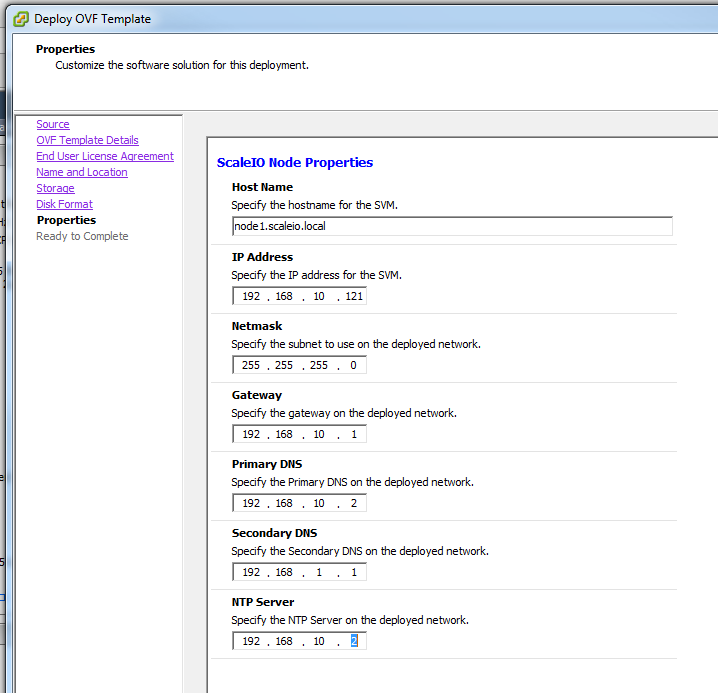
Going through all of the normal options, I was now presented with some prompts…
Cool. Maybe I’ll put a few values in…
Upon powering on the VM… I find I’m where I was before.
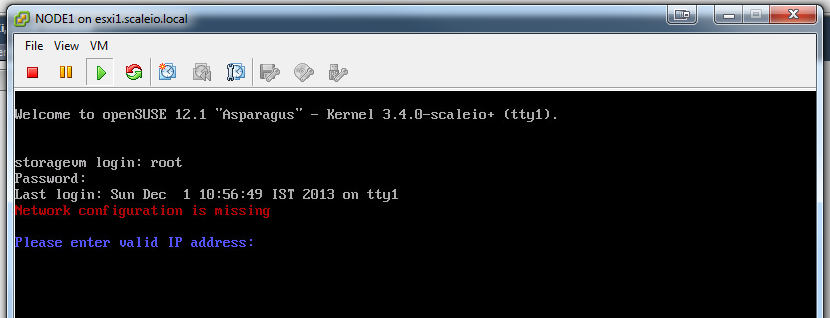
No change. What do I need to do to pass these parameters to my VM, so I can configure my networking?
My VM isn’t using the standard VMware Tools package, but rather open-vm-tools. That’s threw me off.
Executing the following command provided the information I was looking for:
/usr/bin/vmware-rpctool ‘info-get guestinfo.ovfEnv’
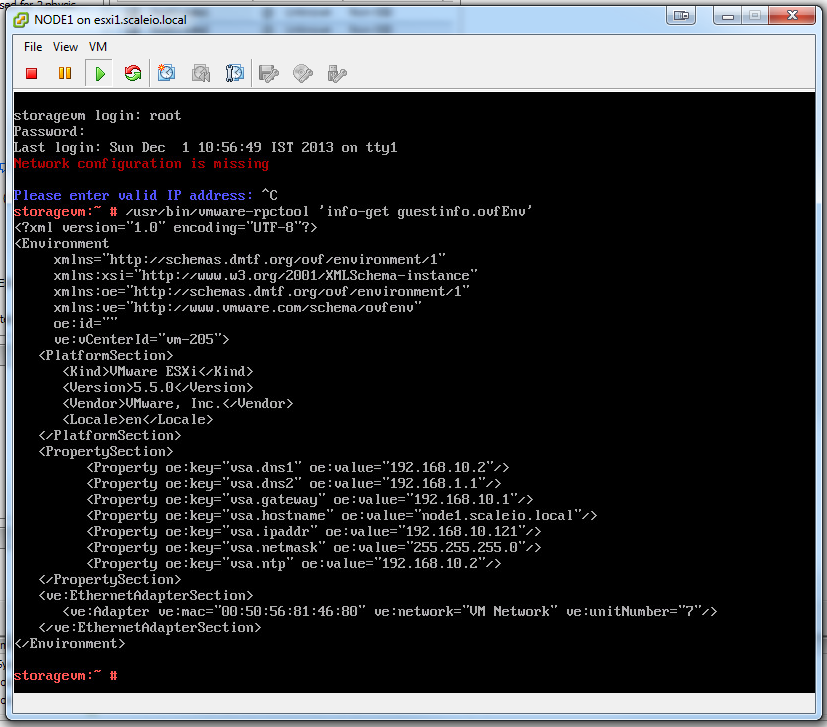 Now I’m getting somewhere…