پیکربندی یک ISILON Cluster
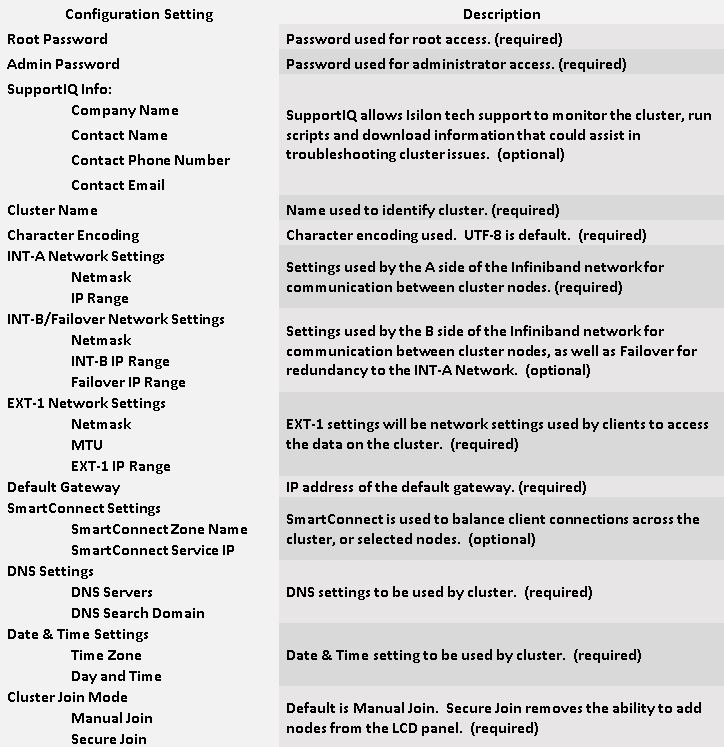
Just like in cooking, a good chef takes a moment to gather the ingredients before diving in. A little “mise en place” goes a long way and makes the task at hand that much more enjoyable. When you first power up an Isilon node, it will enter a configuration wizard that steps you through the configuration process. You will want to have the following information ready to quickly step through the process:
NOTE: “optional” is shorthand for “strongly recommended”.
Connecting to the Isilon
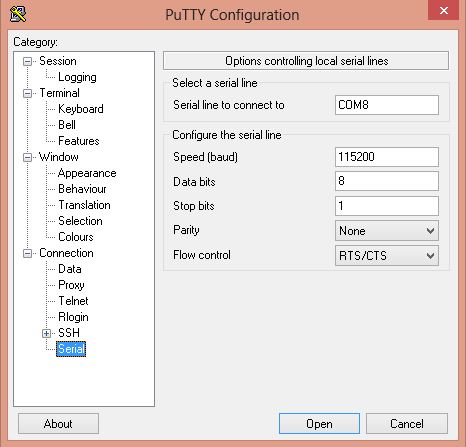
Once you have racked and stacked the Isilon nodes, cabled everything up, and answered all of the questions above…you are ready to connect to the Isilon. For this, you will need to connect to the serial port at the rear of the Isilon node. I use a USB-to-Serial (DB9 Male) coupled with a female-to-female null modem cable and PuTTY to make this connection. First, we need to determine which COM port you are using. A quick check in the Device Manager tells me that my USB-to-Serial adapter is using COM8.
Next, fire up PuTTY (or the terminal emulator of your choice) and enter the following settings under the “Serial” category:
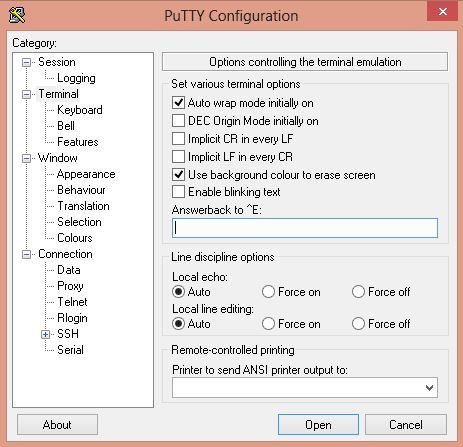
Next, go under the “Terminal” category and clear the “Answerback to ^E” field. This prevents possible cluster hang during configuration.
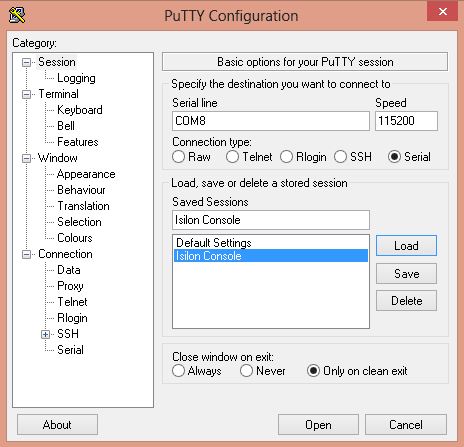
Lastly, go the “Session” category select Serial as the type of connection. This should autopopulate the values you entered under the Serial category earlier. Once everything looks OK, take a moment to save this configuration for future use. I named my saved config “Isilon Console”. Now, click “Open” and start configuring!
Cluster Configuration
Once you open the console, you will be greeted by the configuration wizard that presents you with the Configuration Wizard menu:
Because we are setting up a new cluster, we’ll choose option #1. At this point, the wizard is going to present you with the EULA and begin walking you through the configuration. Having gathered all of this information ahead of time, you’ll simply need to fill in the blanks.
Enter the root and admin passwords you have chosen.

If you choose to enable SupportIQ, enter the information of the primary contact here.
Accept the default UTF-8 character encoding, or choose the encoding you wish to use from the list.

For the internal interfaces, you will need to step through each mini-menu and enter the values you have chosen for int-a, int-b, and failover.
Next, you will be prompted with another mini-menu for your external IP configuration settings.
Enter the IP address of your default gateway…
Configure SmartConnect. SmartConnect zone name must be entered as a FQDN. SmartConnect Basic comes standard with Isilon and allows you to create a DNS Delegation entry on your DNS server. Any connection to the SmartConnect IP will use Round Robin to load balance user connections to your cluster, using the external IP range you provided earlier. For a great how-to on creating a DNS Delegation for Isilon, check out Jase McCarty’s blog post here: Configuring SmartConnect Basic.
Next, we’ll enter our DNS servers and search domains…
Configure your time zone, date & time…
Finally, choose Manual or Secure cluster join modes. Secure cluster join mode makes it so that new nodes added to the cluster cannot be joined using the front panel. Unless you have a strong opinion against Manual mode, stick with the default.
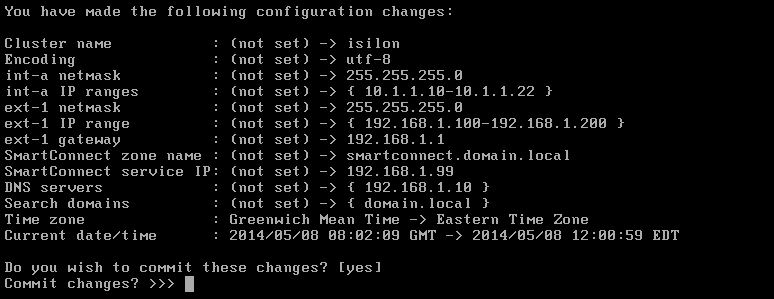
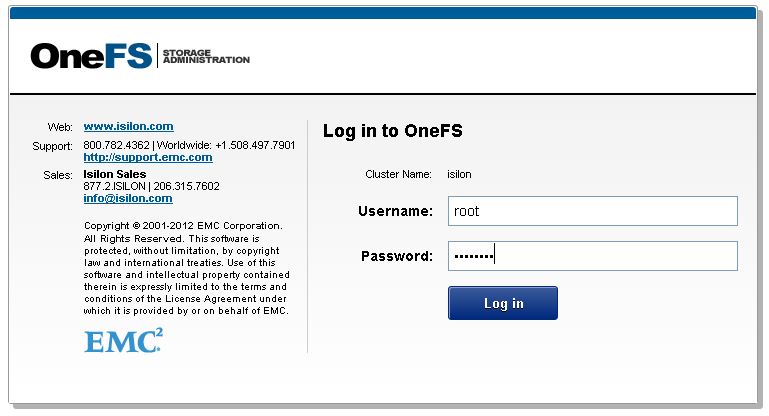
Now, you can review all of those settings and press Enter to commit the changes. A few short moments later, you can fire up your browser, punch in the SmartConnect service IP and…
Log into OneFS with the credentials you gave the configuration wizard.
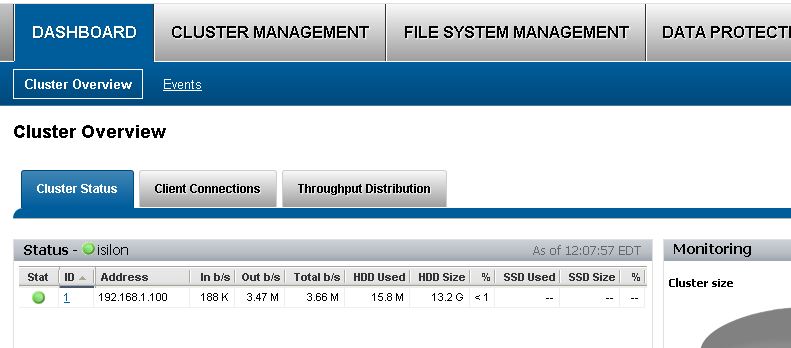
Once you’ve logged in, you will be on the Cluster Overview page of the Dashboard. Here, you can see your first node that has already been given an external IP address from the pool you provided earlier. Now that the cluster configuration is complete, you can add your additional nodes to the cluster.
Adding Nodes to a Cluster
As mentioned before, there are three different ways you can add a node to an existing cluster. The first method, as seen above, is using the CLI. This is not the most convenient way to add a node, because you physically need to connect to the serial port of node you wish to join to the cluster.
The second method you can use to join new nodes to your cluster is the OneFS WebUI. Once cabled, the new nodes will appear in the OneFS WebUI as new, available nodes. Just point your browser to one of the EXT-1 IP addresses in the range you provided and you will be presented with the OneFS WebUI. Once you log in, you will notice that the new nodes you still need to join to the cluster are waiting right there on the Cluster Management > Hardware Configuration > Add Nodes page
The last method is to use the Front Panel on the Isilon node. This is the easiest and quickest way, but use caution! The front panel interface has a center button used to confirm a setting displayed on the LCD. Avoid hitting the center button to “wake up” the display. By doing so, you risk blindly confirming a setting that may have been on the display before the LCD screen dimmed. Instead, press an arrow key on the front display to “wake up” the display. Now, choose “rescan”. You will see the cluster name that you just configured moments ago while in the configuration wizard. Use the arrow keys to choose the cluster you wish to join and confirm with the center button. Within a few seconds, the node will join the cluster. Repeat this process for each additional node that you wish to join to the cluster.
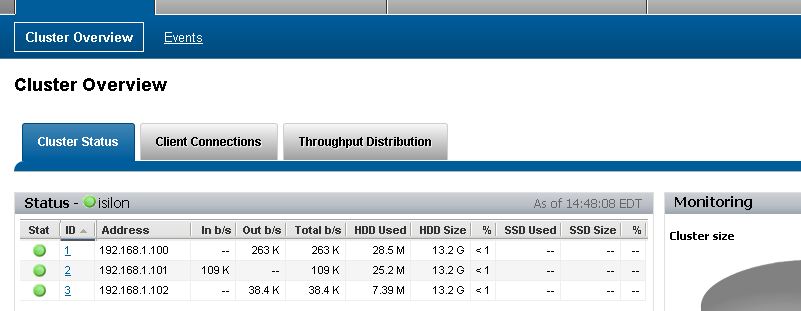
Whichever method you choose, once your nodes have been joined to the cluster, you should see your newly added nodes on the Dashboard…
A quick ifconfig in the CLI shows that each node has been assigned IP addresses from the internal IP range configured during setup.
Next week, we’ll jump into Isilon’s FlexProtect data protection…
