طراحی NSX Lab و راه اندازی NSX Manager
NSX manager provides a centralized management plane across your datacenter. It provides the management UI and API for NSX. Upon installation, the NSX Manager injects a plugin into the vSphere Web Client for consumption within the web management platform. Along with providing management APIs and a UI for administrators, the NSX Manager component installs a variety of VIBs to the host when initiating host preparation. These VIBs are VXLAN, Distributed Routing, Distributed Firewall and a user world agent. The benefit of leveraging a VMware solution is that access to the kernel is much easier to obtain. With that VMware provide the distributed firewall function and distributed routing function in kernel. This provides extremely in kernel function processing without the inadequacies of traditional user space or physical firewall network architectures.
NSX LAB Design:
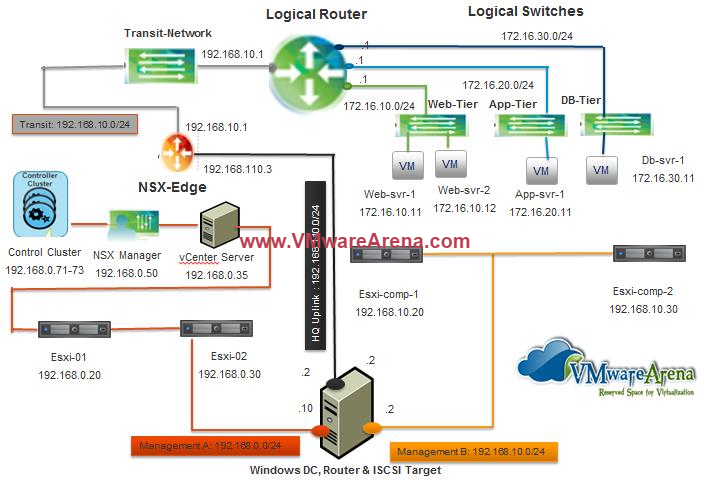
Below is My NSX Lab Design which i am going to use for this Installation Series of posts.
VMwareArena’s NSX Lab Topology:
4 ESXi Hosts:
2 Hosts for Management Cluster Running Infrastructure Virtual Machines (Esxi-01 & ESXi-02):
VM’s Running : NSX Manager, NSX Controllers,vCenter Server(vCSA), Distributed Router VM, NSX Edge VM.
2 Hosts for Compute Cluster (ESXi-comp1 & ESXi-comp2) for Running 3-Tier application VM’s:
VM’s Running: Web-Svr-1.Web-Svr-2, App-svr-1 & DB-svr-1
1 Windows Server:
Windows Server running the below roles:
- Windows Domain Controller
- Router (Routing & remote Access)
- Microsoft ISCSI storage
4 NSX Logical Switches:
- Web-Tier
- App-Tier
- DB-Tier
- Transit-Network
1 Logical Router (LDR-001)
DLR (Distributed Logical Router):NSX Logical Router Connect all 4 Logical Switches (Web-Tier, App-Tier, DB-Tier & Transit-Network). Logical Router Provides routing between the VM connect to these 4 Logical Switches.
1 NSX Edge
NSX Edge Provides routing between 4 Logical Switches to Physical network(HQ Uplink) via Logical Router
Deploying NSX Manager:
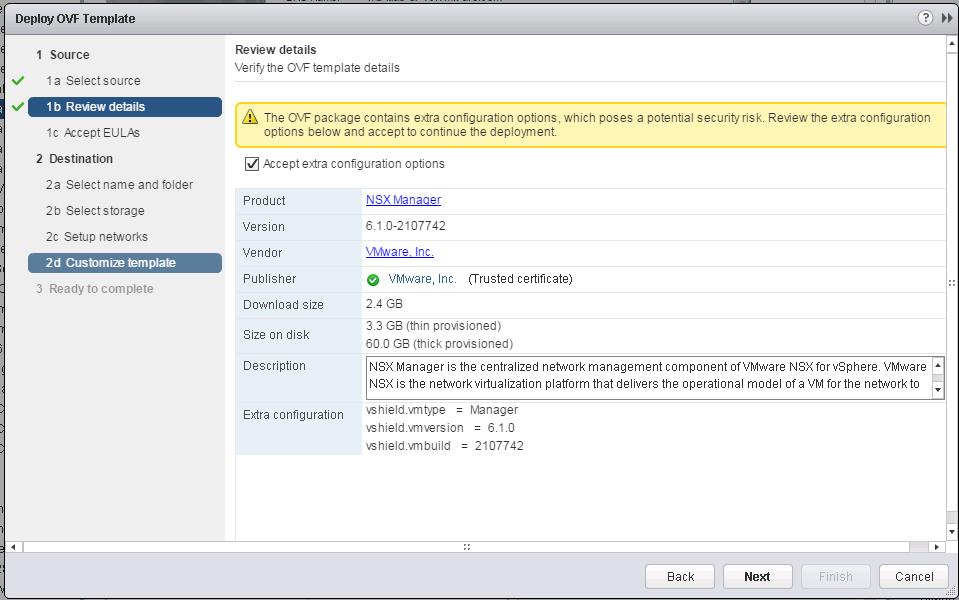
Select the option “Deploy OVF Template” from your ESXi host. You will get OVF configuration options only when you use vSphere Web Client to deploy the NSX Manger OVF. Browse towards your NSX Manager OVF File and Click on Next 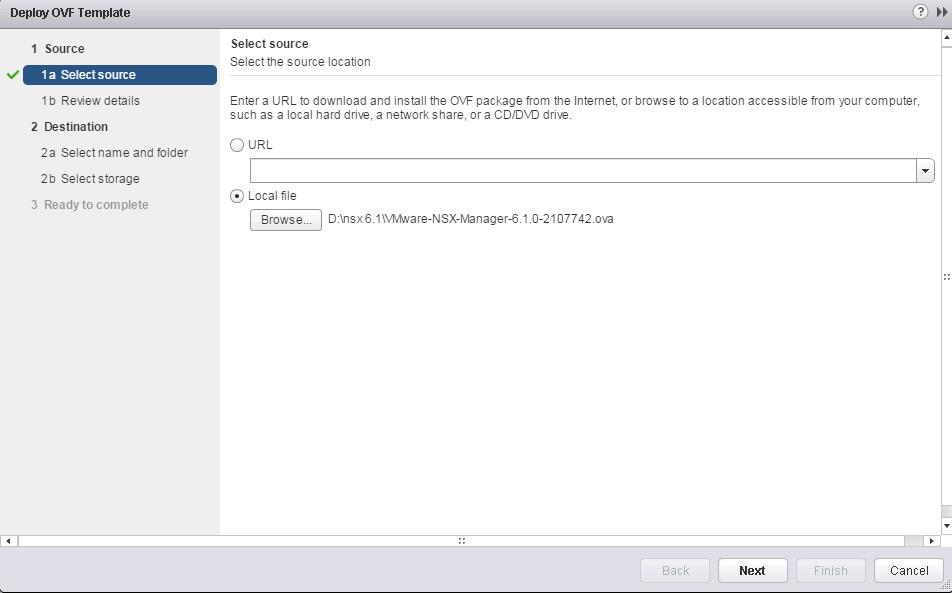 Select the checkbox “Accept extra Configuration options” to configure additional OVF configuration options. Click on Next
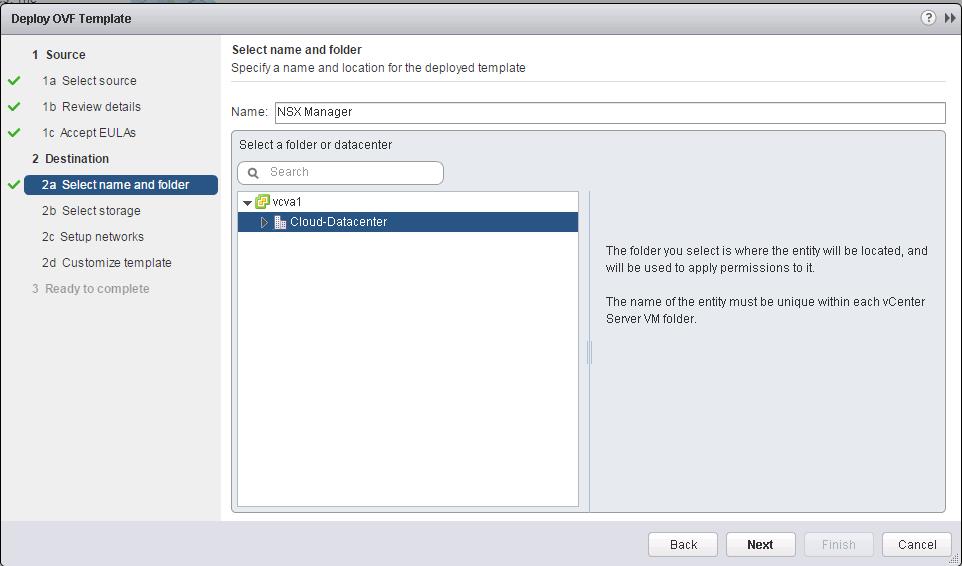
Accept the License Agreement and click on Next.Specify the Name for your NSX Manger VM and Select the folder or datacenter location to deploy the virtual machine.
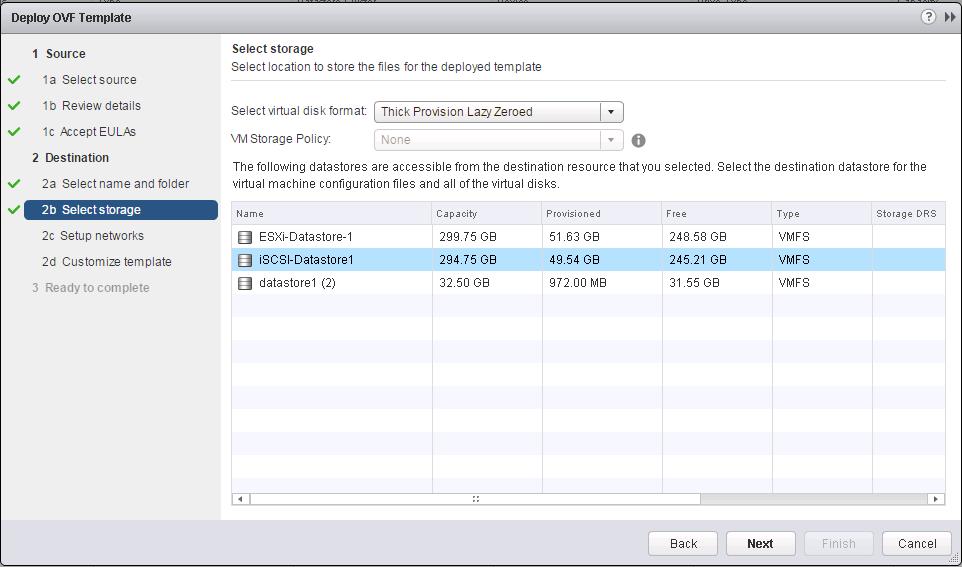
Select the datastore to deploy the NSX Manager Virtual Machine and click on Next
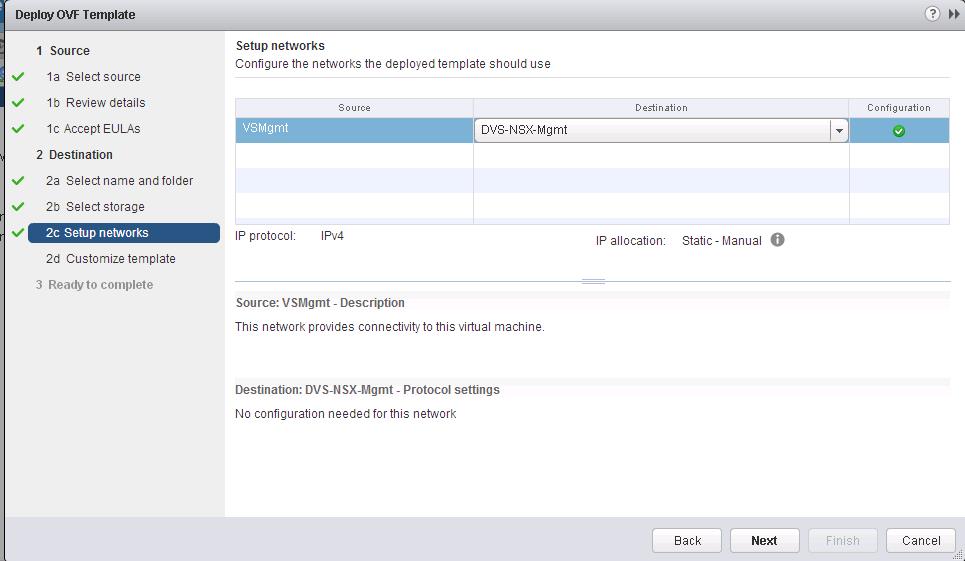
Select the port group to connect the NSX Manager VM and click on Next.
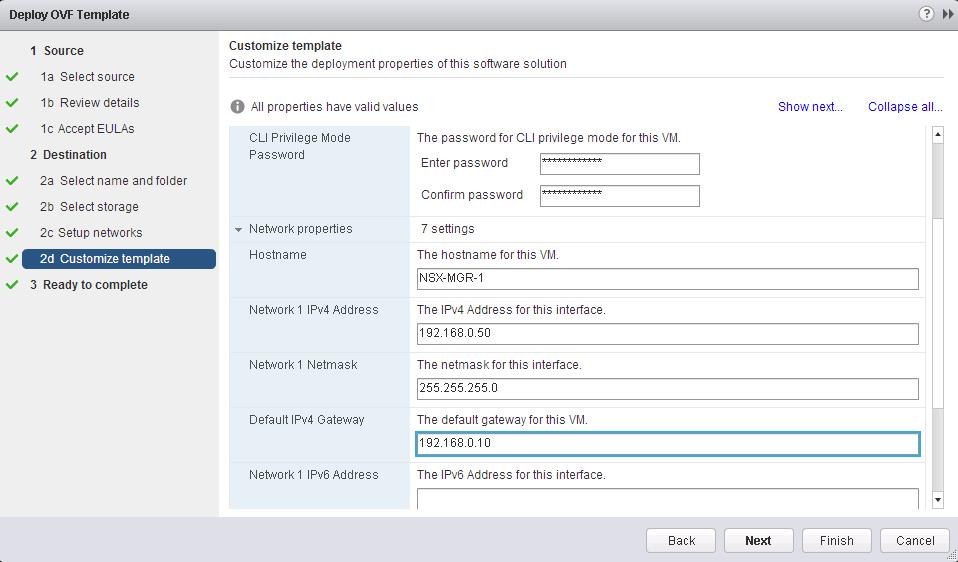
Specify the password for CLI admin and CLI privileged Mode for NSX Manager virtual machine. Click on Show next to specify other options.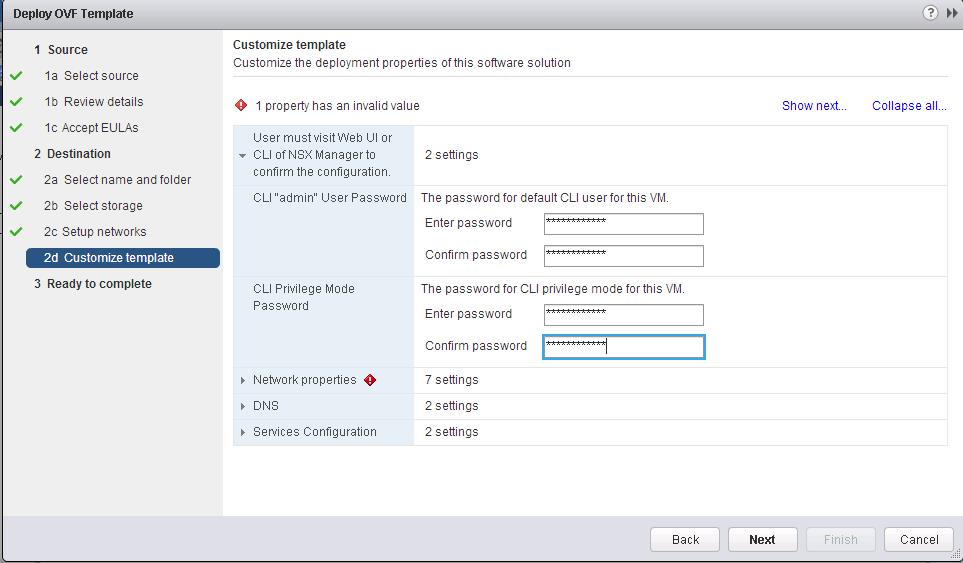
Specify the Network properties (Hostname, IPv4 address, Netmask Default gateway, DNS and NTP settings. Click on Next.
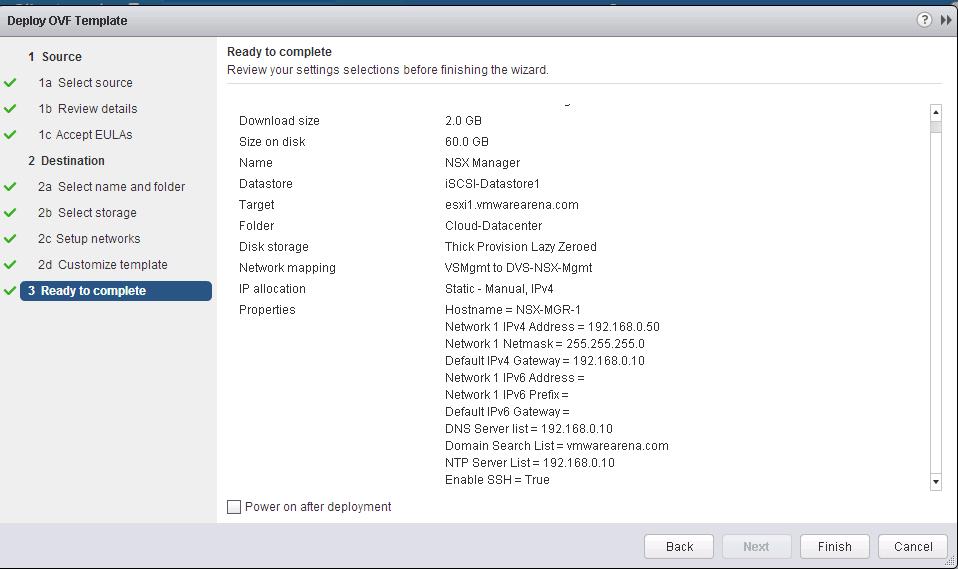
Specify the NTP server list and enable SSH also. Kindly ensure you have valid NTP servers configured in your environment to provide time synchronization for all the servers. Time sync is one of the Important requirement.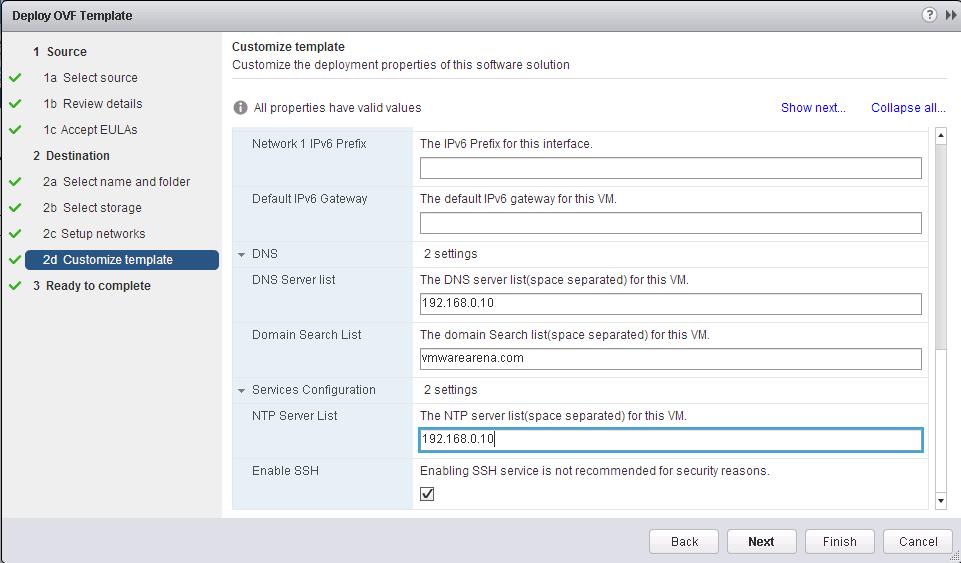
Review the Settings configured and Click on Finish to start the NSX Manger OVF Deployment.
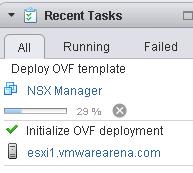
You can Monitor the Progress of NSX Manager OVF template from Recent tasks.
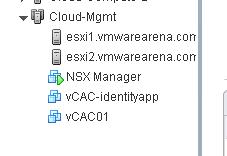
Once “Deploy OVF Template” task completed successfully. You can see the VM “NSX Manager” deployed under the selected Cluster. Power On the Virtual Machine.
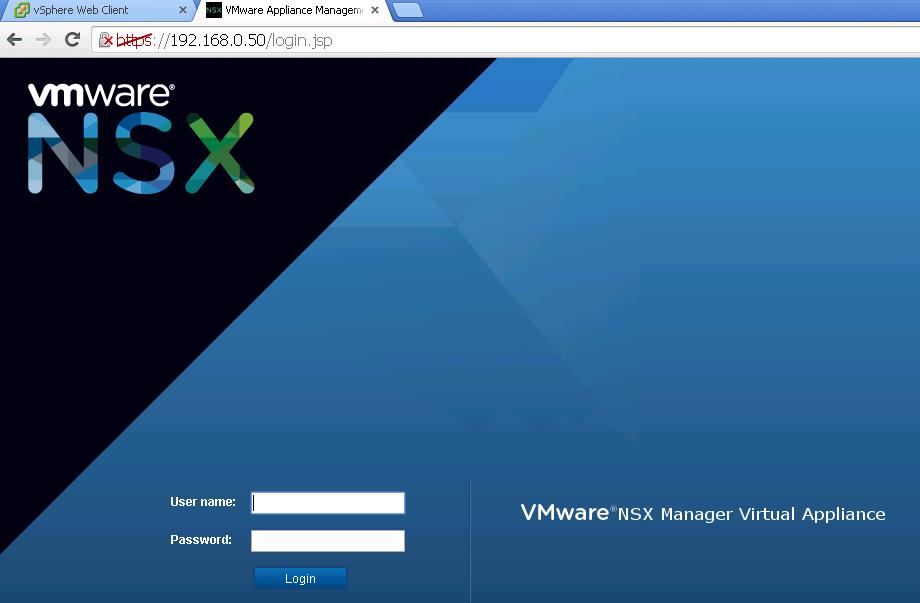
Once OVF deployment is completed, Access the NSX Manager Admin portal from your web browser
https://<ip or Hostname of NSX Manager>
That’s it. We are done with deploying NSX Manager. Let’s discuss about configuring NSX Manager and NSX Manager Integration with vCenter Server in upcoming Posts. I hope this is informative for you. Thanks for Reading!!. Be Social and share it in social media, if you feel worth sharing it.
Other VMware NSX Related Posts:
VMware NSX Installation Part 1 – NSX Overview & Installation Prerequistes
VMware NSX Installation Part 2 – NSX Lab Design & Deploying NSX Manager
VMware NSX Installation Part 3 – Integrating NSX Manager with vCenter Server
VMware NSX Installation Part 4 – Deploying NSX Controller
VMware NSX Installation Part 5 – Checking NSX Controller Status
VMware NSX Installation Part 6 – Preparing Cluster and Hosts for NSX
VMware NSX Installation Part 7 – Verify NSX VIBs Installation from ESXi hosts
VMware NSX Installation Part 8 – Configuring VXLAN on the ESXi Hosts
VMware NSX Installation Part 9 -Create Segment ID and Transport Zones
VMware NSX Installation Part 10 – Create NSX Logical Switch
VMware NSX Installation Part 11 – Creating Distributed Logical Router
VMware NSX – Backup & Restore VMware NSX Manager Data
VMware NSX – Unable to Delete/Remove NSX Logical Switch
VMware NSX – How to Manually Install NSX VIBS on ESXi Host
VMware NSX – How to Manually Remove NSX VIBs from ESXi Host?
How to Remove NSX (Network & Security) Extension from vSphere Web Client
