نحوه نصب دستی NSX VIBS بر روی هاست ESXi
Job of vSphere Administrators is not so limited to GUI. You should be always available with troubleshoot your issues from command line or CLI.This also applies, when you are dealing with VMware NSX. We have already discussed about Preparing your vSphere CLuster and Host by installing NSX VIBS from Network & Security plugin from vSphere Web Client. It always a situation that the installation of NSX VIB’s may fail due to some reason and we as vSphere admin should have to troubleshoot and fix the installation issues. I have faced one of the issue when i prepare my cluster/ ESXi host for NSX. Let’s take a detailed look at setp by step procedure to manually install NSX VIBs on the ESXi host.
Download NSX VIBs from the below URL:
https://<NSx-Mgr-IP>/bin/vdn/vibs/5.5/vxlan.zip
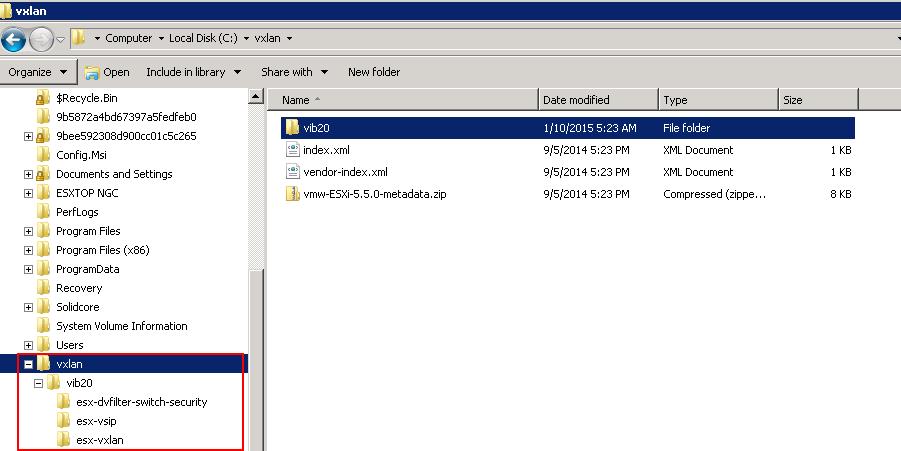
If you extract the downloaded “vxlan.zip”. Below are contents of the vxlan.zip. It Contains the 3 VIB files
- esx-vxlan
- esx-vsip
- esx-dvfilter-switch-security
One VIB enables the layer 2 VXLAN functionality, another VIB enables the distributed router, and the final VIB enables the distributed firewall.
Extract the vxlan.zip file and Copy the folder into the Shared Datastore or on the local folder of the ESXi host using WinScp. I have copied the folder into my ESXi host in /tmp directory. Let’s install the NSX VIBs one by one in the ESXi host.
Install the “esx-vxlan” vib on the ESxi host using the below command:
esxcli software vib install –no-sig-check -v /tmp/vxlan/vib20/esx-vxlan/VMware_bootbank_esx-vxlan_5.5.0-0.0.2107100.vib
Install the “esx-vsip” vib on the ESXi host using the below command:
esxcli software vib install –no-sig-check -v /tmp/vxlan/vib20/esx-vsip/VMware_bootbank_esx-vsip_5.5.0-0.0.2107100.vib
Install the “esx-dvfilter-switch-security” vib on the ESXi host using the below command:
esxcli software vib install –no-sig-check -v /tmp/vxlan/vib20/esx-dvfilter-switch-security/VMware_bootbank_esx-dvfilter-switch-security_5.5.0-0.0.2107100.vib
That’s it. We are done with manually installing NSX VIBs on ESXi host. This operations don’t require reboot of the ESXi host. Even this can be done when active workloads are running on the ESXi host. I hope this is informative for you. Thanks for reading. Be Social and share it in social media, if you feel worth sharing it.
Other VMware NSX Related Posts:
VMware NSX Installation Part 1 – NSX Overview & Installation Prerequistes
VMware NSX Installation Part 2 – NSX Lab Design & Deploying NSX Manager
VMware NSX Installation Part 3 – Integrating NSX Manager with vCenter Server
VMware NSX Installation Part 4 – Deploying NSX Controller
VMware NSX Installation Part 5 – Checking NSX Controller Status
VMware NSX Installation Part 6 – Preparing Cluster and Hosts for NSX
VMware NSX Installation Part 7 – Verify NSX VIBs Installation from ESXi hosts
VMware NSX Installation Part 8 – Configuring VXLAN on the ESXi Hosts
VMware NSX Installation Part 9 -Create Segment ID and Transport Zones
VMware NSX Installation Part 10 – Create NSX Logical Switch
VMware NSX Installation Part 11 – Creating Distributed Logical Router
VMware NSX – Backup & Restore VMware NSX Manager Data
VMware NSX – Unable to Delete/Remove NSX Logical Switch
VMware NSX – How to Manually Install NSX VIBS on ESXi Host
VMware NSX – How to Manually Remove NSX VIBs from ESXi Host?
How to Remove NSX (Network & Security) Extension from vSphere Web Client


