نصب ESXi 6 بر روی فلش یا از روی فلش USB
VMware ESXi hypervisor can be installed on USB stick, but you can also create USB stick which contains ESXi installer in case your server does not have CD/DVD drive. You could see in my previous post when wrote small tutorial on Install VMware ESXi on USB memory stick by using Unetbootin Freeware. I received few questions through e-mail recently as my readers got confused about the installation process and the way to install ESXi 6 to USB Flash drive or another way.
To use USB flash with bootable ESXi AND to be able to use it in case your server does not have CD drive you can create USB flash which boots the hypervisor and allows the installation. When thinking now, there is another use case possible – to create multiboot environment on the USB and have a possibility to install different OS from that USB. But I guess that this will be a separate post!
The 2 use cases that we cover today:
1. Install ESXi to USB as a destination – the server will boot directly from USB. The ESXi gets pre-configured within VMware Workstation (or Player).
2. Load the installer from an USB stick to install and configure your system (in case your server does not have CD drive). So in this case the server will boot from the USB stick and then only you’ll configure the root password, network settings etc…
So basically today’s tutorial will show how to install ESXi to USB and in the second one will I’ll create a USB stick with ESXi Installer on it so it’s possible to use it to install a server with ESXi. In one of my previous tutorial for ESXi 5.x I was using Unetbootin which worked like a charm. But today we’ll test another tool called Rufus which I found good echoes about through VMware communities and a fellow blogger Paul Braren (@tinkererguy). So without further wait let’s doQuick Install of ESXi 6 to USB
Install ESXi 6 to USB as Destination
Use VMware Workstation or Player to do the job! It works and it allows to actually pre-configure the system like enter the root password, network settings etc….
1: Use VMware Workstation to create a new VM > point to the ESXi 6 iso as a source andmount the USB stick (Do a right click > connect (disconnect from host) so the VM can see it and can use it as a destination.)
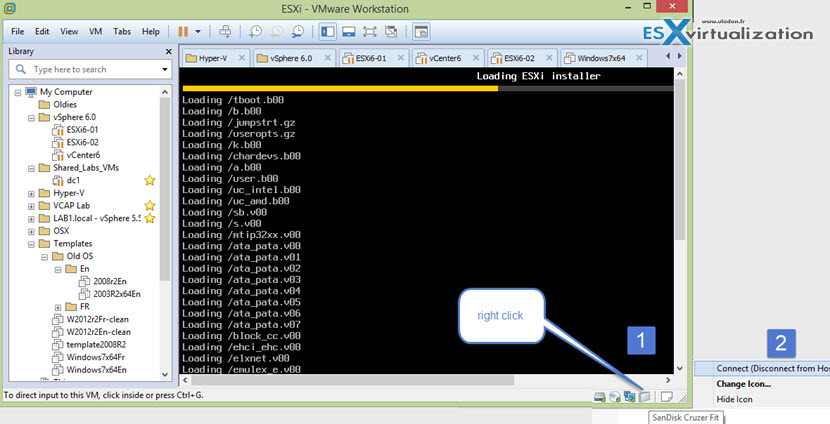
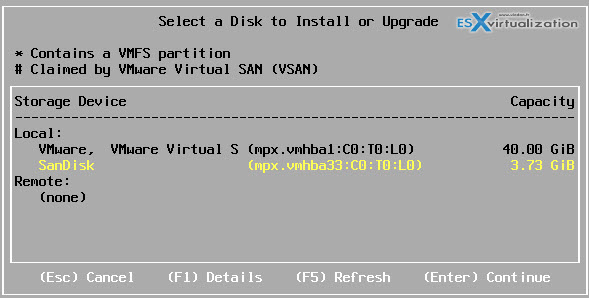
You’ll see screen like this. Note that SanDisk USB as an option for destination disk…
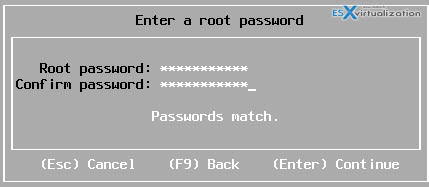
Before the installer starts it asks you to setup the keyboard and root password. This is quite important as the default language is English, but then not everyone uses English keyboard, right? So choosing your language during those steps avoids some headaches when you seek for this or that particular key you have used in your password … -:)
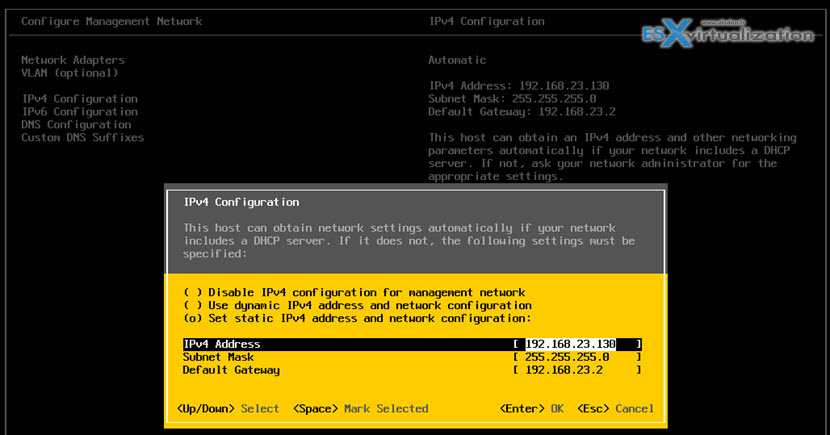
Once installation finishes, just disconnect the USB stick from within Workstation and plug it in your server. You’ll need to configure the BIOS to boot from that device. You’ll do some quick network configuration. Those configuration steps are very easy to do as you’re basically guided when you first open the DCUI (direct console user interface). You’ll need to hit F2 key in order to access the DCUI.
Step 2: The first boot allows you to set IP address and other network settings like netmask, DNS, hostname…. Again. Very easy so guys who knows your way just skip the rest as this post …
Install ESXi From Bootable USB (your server does not have CD/DVD drive)
This method is particularly useful when you works with blades or servers which does not have CD/DVD drive and PXE environment isn’t an option.
Step 0. Download ESXi 6 (if you haven’t done it yet and place the ISO to a folder on hard drive)

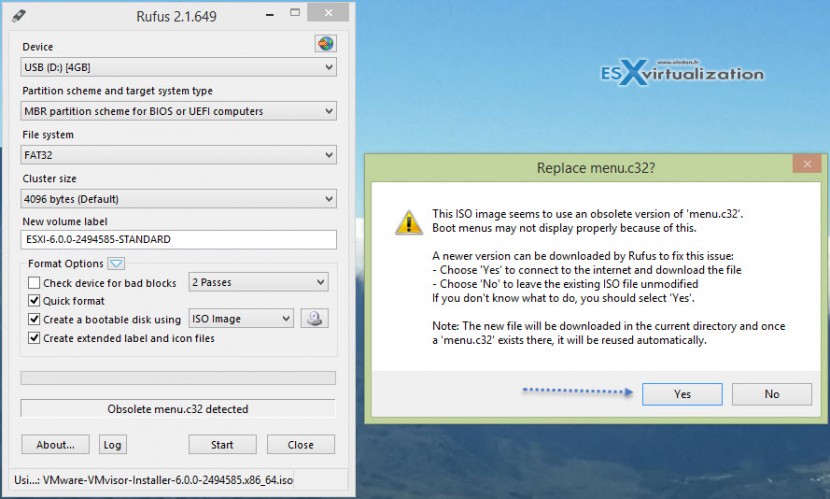
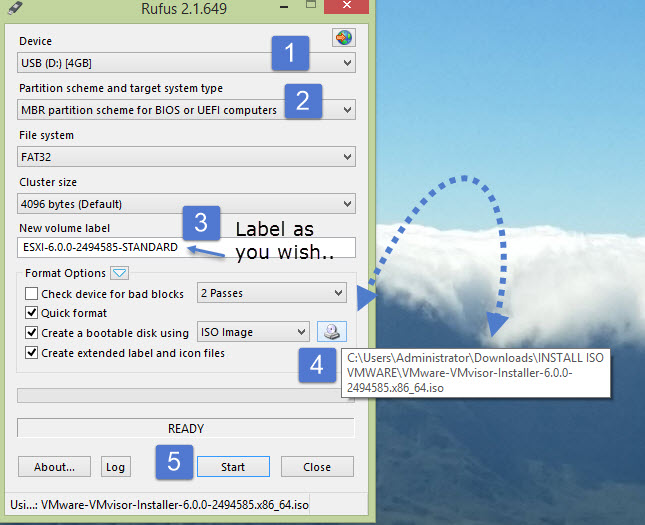
Step 1. Download Rufus and Execute the program (simple executable) > select your USB >Label the volume > Select your ESXi ISO you have downloaded in Step 1 > Hit the Startbutton.
You will receive a prompt about one file which is obsolete (according to the program) > just click Yes to continue…
The prompt looks like this…
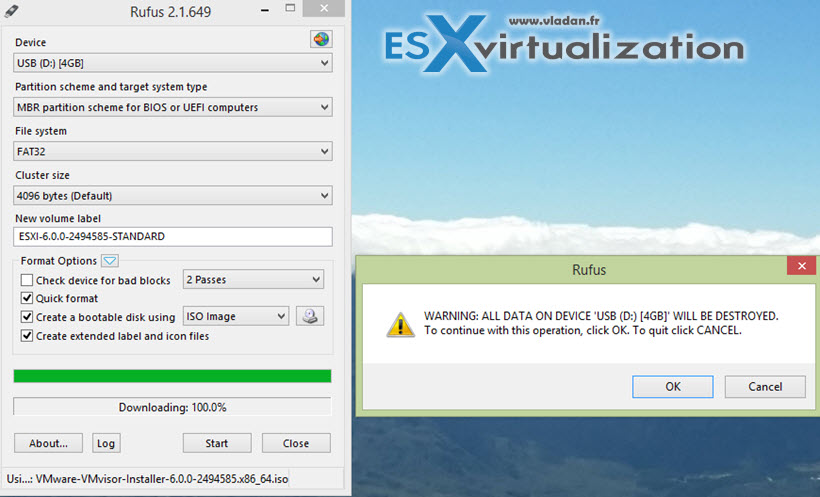
Another prompt will ask you if you want to overwrite your USB flash key. Click YES.
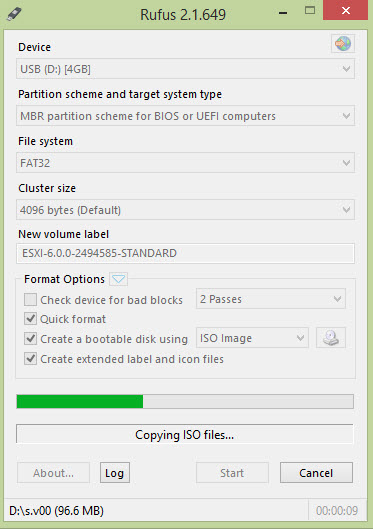
Wait till Rufus creates a file structure and copies the ISO to the USB key….
Next plug-in this key to your server > change the boot order in BIOS to boot from USB > And you’ll see the ESXi 6 installer starting…

The loader…

And? Follow the same steps as previous tutorial to configure your server…
When you boot a server with USB Flash Drive the ESXi Installer will copy the whole installer to the memory. So basically you can install ESXi to the same USB where you are installing from. All you have to do is to select it during the installation as a destination.
With that said, I hope that you have enjoyed today’s tutorials and you’ll re-tweet this post to all your friends and followers -:)… I was testing if it’s possible to create a multiboot USB with different versions of ESXi but I guess I must find a manual way (tried a freeware tool which did not work – Xboot).
