چگونگی انتشار Automated Virtual Desktop Pool با VMware View
First, you should examine your group structures in Active Directory. You may wish to create a group structure specifically for assigning the right users to the right virtual desktop pool.
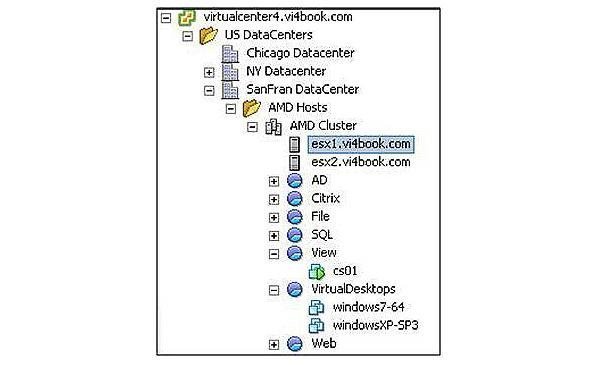
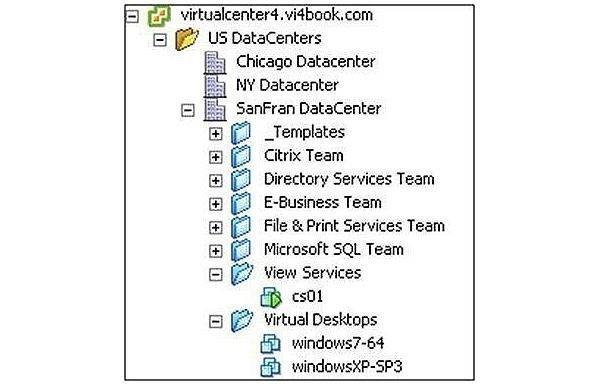
Second, you might want to create a similar structure in VMware vCenterof resource pools and virtual machine (VM) folders to keep yourVMware View environmentseparate and distinct from the rest of your virtual infrastructure.
Figures 1 and 2 below show my configuration.
How to publish a persistent virtual desktop pool
As you can see in the figures above, I have both a resource pool and VM folder structure for my View environment.
Windows7-64 and WindowsXP-SP3 are my test virtual desktops, which I will convert into templates to form the basis of my virtual desktop pools. The desktop pool feature uses templates, Microsoft Sysprep and the guest customization configurations (Figure 3) to automate the bulk creation of virtual desktops. As such, I always test my templates and the guest customization configurations to make sure they work before even thinking about creating a virtual desktop pool.
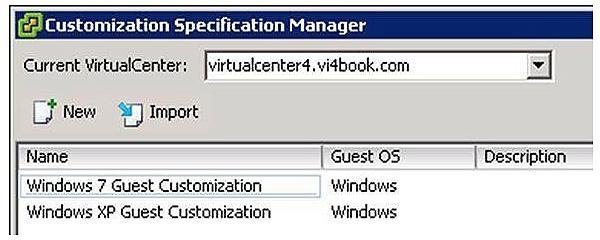
The guest customization stored in vCenter must be DHCP-based otherwise it will not be shown. VMware View assumes all your virtual desktops will be configured as DHCP clients.
It’s important to note that templates created for virtual desktop pools must be in the “Convert to Template” format. They cannot be in the “compact” format you see in the Clone to Template wizard. People often forget that when they make a VM into a template, everything about the VM is captured as part of the template, including connected CD-ROMs and floppy disks.
Additionally, you can store a password to reset the administrator’s password in a Guest Customization Wizard in Windows. These passwords are protected by encryption by using a public key. The user account that VMware View uses to communicate to VirtualCenter must have rights to theGuest Customization Settings. To do that you must:
Log in to the Administrative webpage of the Connection Server.
Click the Desktop and Pools icon.
Click the blue Add… hyperlink.
Choose the option called Automated Desktop Pool.
In the Desktop Persistence page, shown in Figure 4 below, select Persistentas the type.
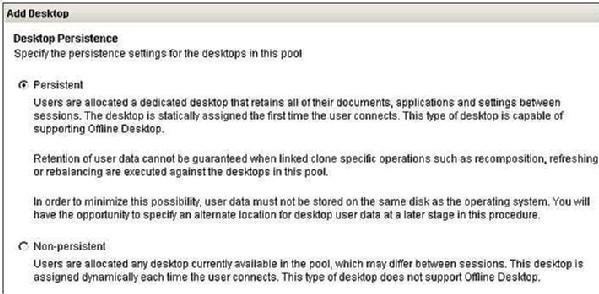
Remember that with a persistent desktop the user is randomly assigned a virtual desktop from the pool, but always returns to their personal desktop.
Choose the option called VirtualCenter virtual machine. Supports Offline Desktop.
Select the VirtualCenter which manages the virtual desktop.
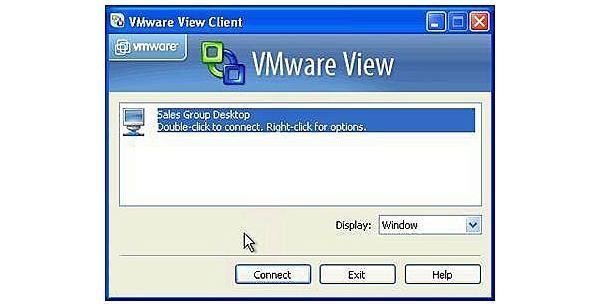
Next, you must specify a unique ID for this virtual desktop together with some friendly information that workers can use to identify the virtual desktop. In my case, I set the friendly name to “Sales Groups Desktop.”
The next page allows you to control some per-virtual desktop settings related to the end-user connection.
The Automated Provisioning Page (Figure 5) controls how the virtual desktops will be created in the pool.
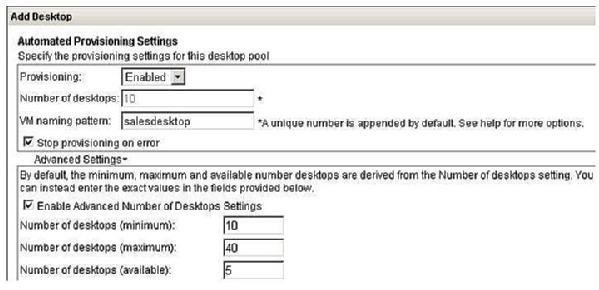
The option called Provisioning with the setting Enabled means that after clicking Finish in the Web-admin wizard, the creation of the virtual desktops in the pool will begin automatically. The VM naming pattern is used to set the NETBIOs name of Windows as the desktops are created, and also creates a folder to contain them. The Stop Provisioning on Error option will halt the creation of the pool if a significant error occurs such as running out of space in the VMFS volume.
Clicking the Advanced settings options allows you to set a Maximum,Minimum and Available setting. In my case, the absolute maximum number of virtual desktops is 40, and after clicking Finish, 10 virtual desktops will be created. Once these 10 desktops have been allocated, VMware View will create another five.
The idea of this is to create only the number of desktops you initially need (10). As your organization grows and employs new users, it will generate the virtual desktops needed (5), however because you will run out of disk or memory, you must cap this growth (40). These fields contain validation so it is impossible to set something that is illogical:

In my case, to save disk space and time, I actually used 2,10,2 for the settings.
Next, select the template (Figure 7) that will form the basis of the Persistent Virtual Desktop Pool.
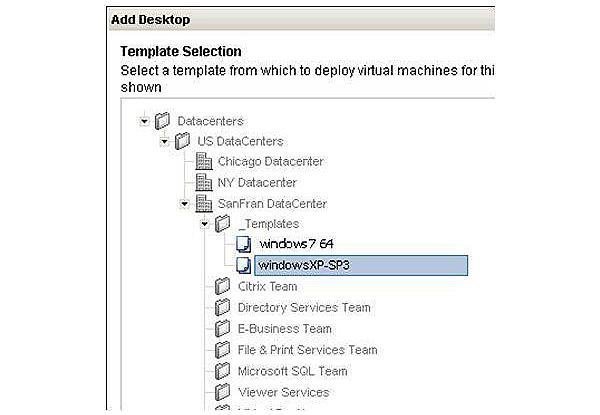
Because Windows 7 was not properly supported at the time of writing and Windows XP takes very little disk space by comparison, I used a Windows XP Virtual Desktop Template as the source of my desktop pools.
Next, select a virtual machine folder to contain your virtual desktop pool (Figure 8).
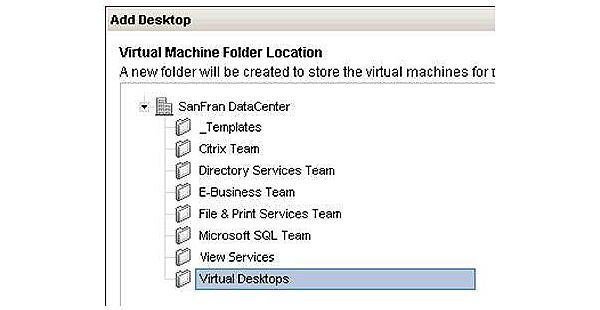
Next select an ESX Host or Cluster for the virtual desktop pool to run on (Figure 9).
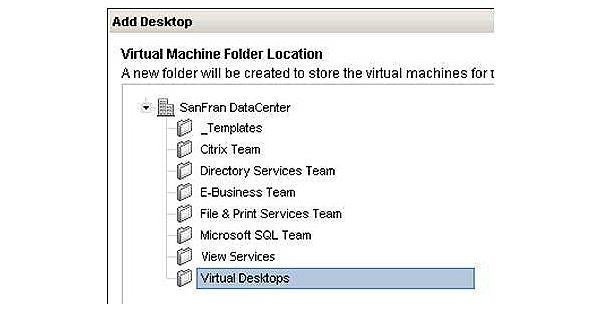
Notice how I can only see the SanFran DataCenter. This is because my template is restricted in its use to the ESX hosts in the SanFran DataCenter where it is registered.
Select a Resource Pool or Cluster where the virtual desktops will be contained (Figure 10).
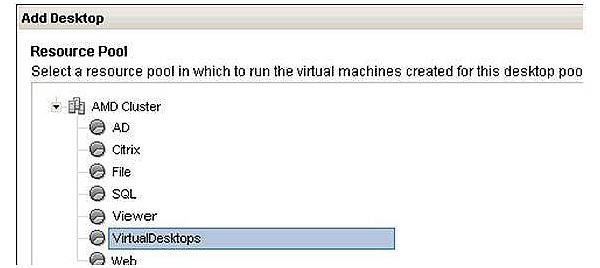
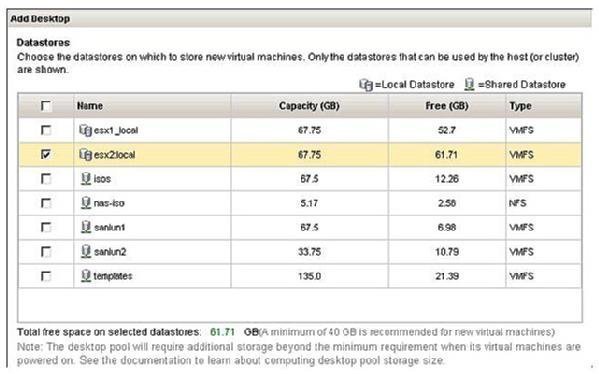
Figure 11 depicts where to select a storage location. I decided to use local storage because I don’t have SAN-based storage.
The somewhat cryptic warning at the bottom of this dialog box is a reminder that you don’t just need space for the virtual disks of the virtual desktops, but also their swap files. It is possible to select more than one datastore in this list, and if you do, View will distribute the virtual desktop across the datastores selected.
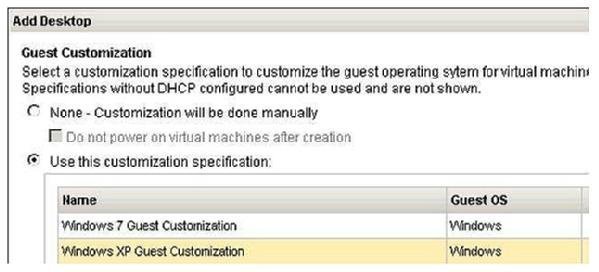
Finally,select a Guest Customization Setting (Figure 12) for the correct operating system that joins the virtual desktop to a valid Microsoft Active Directory Domain.
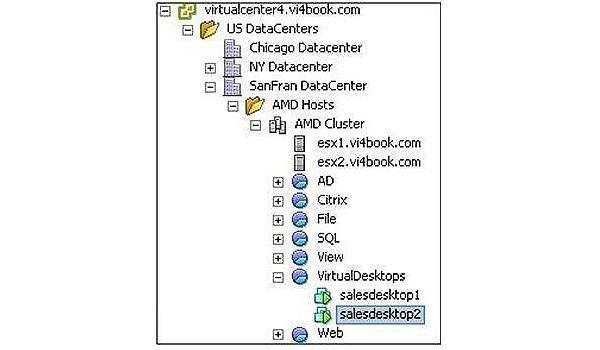
Clicking Finish should trigger the provisioning process and create a folder to hold the virtual desktops created in the pool (Figures 13 and 14).
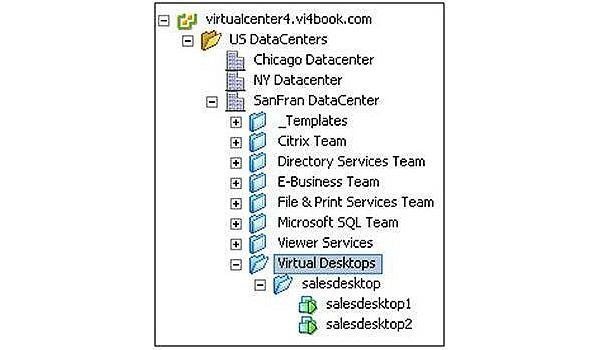
Finally, set the VMware View rights to allow all the Sales Group to access the desktop.
As depicted in Figure 15, select the virtual desktop pool in the list and click the Entitlements… link.

In the Entitlements pop-up page, click the Add button.
Disable the filter on Users, and Enable the filter on Groups.
Click the Find button and locate the correct group, in my case Sales Group (Figure 16).
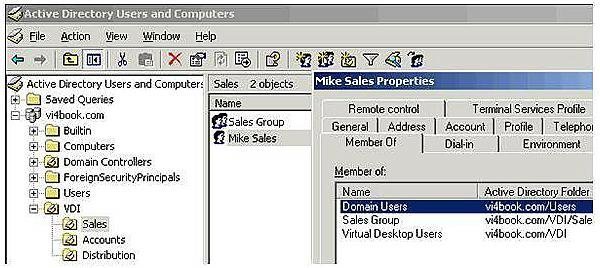
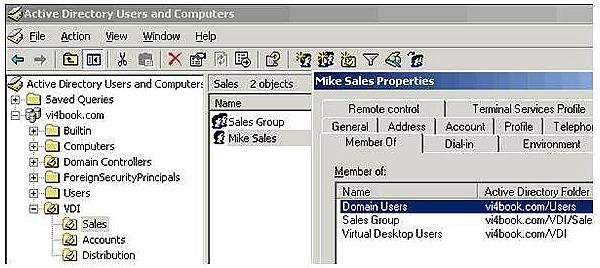
In my group model, I used the “Virtual Desktop User” group to handle the Windows rights required to make Microsoft’s Remote Desktop Protocolwork. I used the membership of a functional user group (Sales, Accounts, Distribution) to handle access to a particular desktop pool. Of course, there are many different ways to handle the group structures depending on the size of your organization and the complexity of the end-user base.
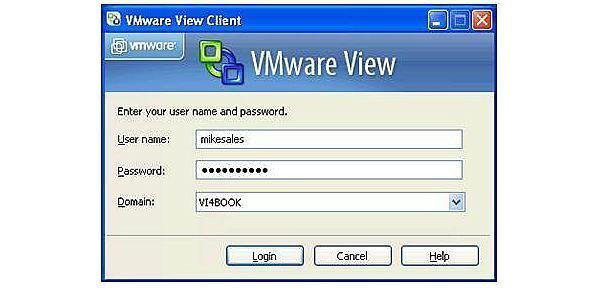
As a test, I created a user called “Mike Sales” and added him to both the Virtual Desktop User Group and Sales User Group. Membership of both groups is required in my case for this user to connect (Figures 17-19).
How to publish a non-persistent virtual desktop pool
Non-persistent virtual desktop pools are set up in a very similar way as persistent pools. They differ in one crucial respect: The user is merely allocated a virtual desktop when they log on. When they log off, we can set an option to delete their old virtual desktop.
PRO+
Content
Find more PRO+ content and other member only offers, here.
This has the net effect of giving the user a clean environment every time they log in. This can be helpful in kiosk environments, such as a school or airport. Due to their volatile nature, it is imperative that non-persistent virtual desktop users are not allowed to save files on the desktop or on the C: drive. If they do, when they log off, the data will be lost forever.
By now you are probably very familiar with the pages of VMware View Web administration, so I will keep screen grabs down to an absolute minimum in the following instructions:
Log in to the Administrative Web page of the Connection Server.
Click the Desktop and Pools icon.
Click the blue Add… hyperlink.
Choose the option called Automated Desktop Pool.
In the Desktop Persistence page, select Non-Persistent as the type.
In the Add Desktop page enable the option “Power off and Delete the virtual machine after first use” (Figure 20).
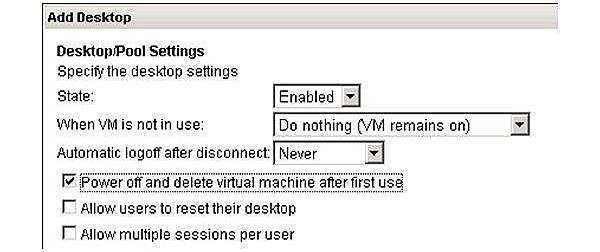
his page also has an “Allow multiple sessions per user” option which you do not see in the persistent desktop process.
Choose the option called VirtualCenter virtual machine. Supports Offline Desktop.
Select the VirtualCenter which manages the virtual desktop.
Next, you must specify a unique ID for this virtual desktop together with some friendly information that someone can use to identify the virtual desktop. In my case, I set a friendly name of Student Desktop.
The next page allows you to control some per-virtual desktop settings for the end-user connection.
The Automated Provisioning Page controls how the virtual desktops will be created in the pool.
Next, select the template that will form the basis of the Non-Persistent Virtual Desktop Pool.
Select a virtual machine folder to contain your virtual desktop pool.
Next, select an ESX Host or Cluster for the virtual desktop pool to run on.
Select a Resource Pool or Cluster where the virtual desktops will be contained.
Select a storage location.
Finally, select a Guest Customization Setting for the correct operating system that joins the virtual desktop to a valid Microsoft Active Directory Domain.