نصب و پیکربندی FreeNAS 8
FreeNAS 8 got installed and configured in no time on my NAS box. With my Do it yourself NAS series, recently there has been a new release of FreeNAS 8. Since I tested the 7.2 quite deeply in my small lab and quickly the Beta RC4 of the FreeNAS 8, I was just happily surprised that the release of the FreeNAS 8 has made it so quickly. So I downloaded the ISO and installed it on my homemade NAS system.
If you did not read the earlier parts of the series, just quickly what’s all about. The system was built by me from parts widely available to prove and to show that it’s possible to build a Home made NAS box without being an ace for much cheaper then commercial NAS boxes.
The installation of FreeNAS was performed to the internally plugged-in USB stick (you can see all the parts used in the system in first part: How to build a low cost NAS for VMware Lab. Then there are 4 SATA drives and 2 SSDs. One SSD of capacity 128Gigs and the second one 64Gigs. I’m gonna use those SSD’s for “Tier 1 storage” and (or) for caching the VMs swap files to improve overall performance of my NAS.
After the installation finished, the configuration steps were done in 5 minutes of time……There is actually less features in the version 8 of FreeNAS, and also the GUI is quicker, because it’s using the TreeMenu by default and it’s all written in Django.
A quick quote from the FreeNAS Blog:
The release of FreeNAS 8 includes major architectural optimizations, a django-driven user interface, and ZFS – lending us some useful features like thin provisioning, periodic snapshots, LDAP and Active Directory authorization along with the most popular platform sharing protocols.
FreeNAS 8 retains enterprise-class services while eliminating some “Home User” functionality such as iTunes/DAAP, Bit Torrent, and UPnP. These features will make it back as third-party plugins at a later date.
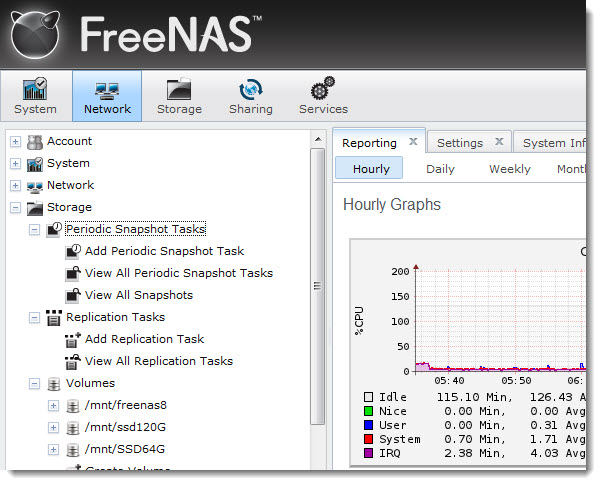
But let’s move on and I’ll show you what I configured on the installed system to be able to access the NFS share from my VMware vSphere running some ESXi Whitebox. I’m not gonna repeat the part of the installation where you have to choose the destination disk for the installation (USB stick Kingston in my case) since it’s identical to FreeNAS 7.2, so if you want to have a look at that part of the installation you can do so by reading this part here: VMware Home Lab: building NAS at home to keep the costs down – installing FreeNAS.
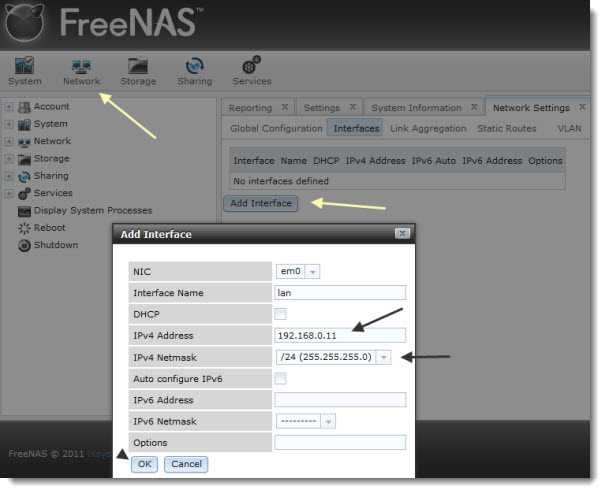
After the first reboot the box come up with an adress assigned by a DHCP server, so first thing to do is to configure a static IP adress. You connect via the web browser interface and you’ll useadmin and freenas as a login/password combination. Then you’ll go to do this you’ll go toNetwork > Add interface.
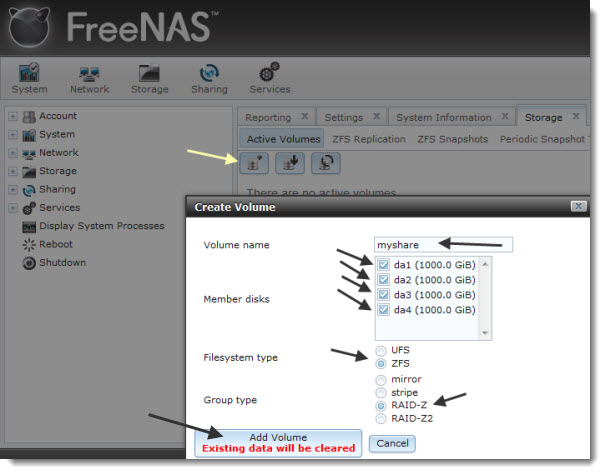
The next step is to Add all the SATA drives present and create a RAID.
To do this you go and click the Volumes > Create Volume. In the pop-up window just click the check mark to select the disks you want to create a RAID volume with. In my case I checked the four sata drives and created a RAID-Z array. (a ZFS raid with single disk failure option). If you take the RAID-Z2 you can have a failure on 2 disks simultaneously.
Easy, even an eight year old boy could do it… -:)
So after I did this, I ended up with a volume created and this volume can be shared now.

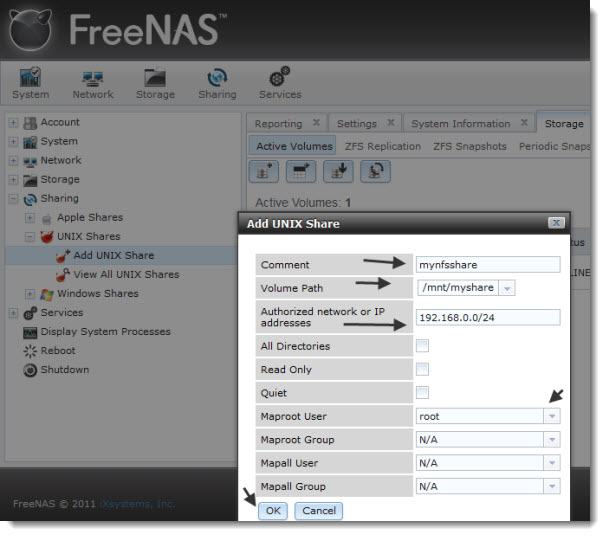
Now the next part will be the NFS part. First you must create the NFS share which will be visible for your ESXi server. As you can see the root user is mapped to the root user I’m using on the other side on my ESXi system. Make sure that on both sides you use the same password….
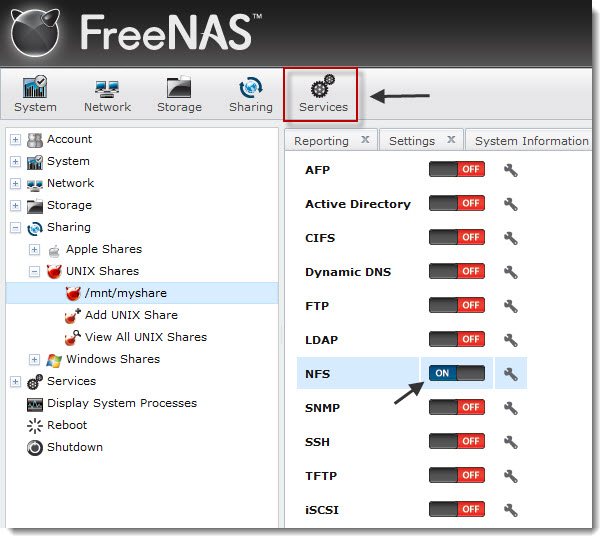
What next? Oh, activating the NFS service and here we go…
The access form the ESXi side did not change so if you want to see how-to connect via NFS from ESX(i) server, just go and read this article: installing FreeNAS (7.2).
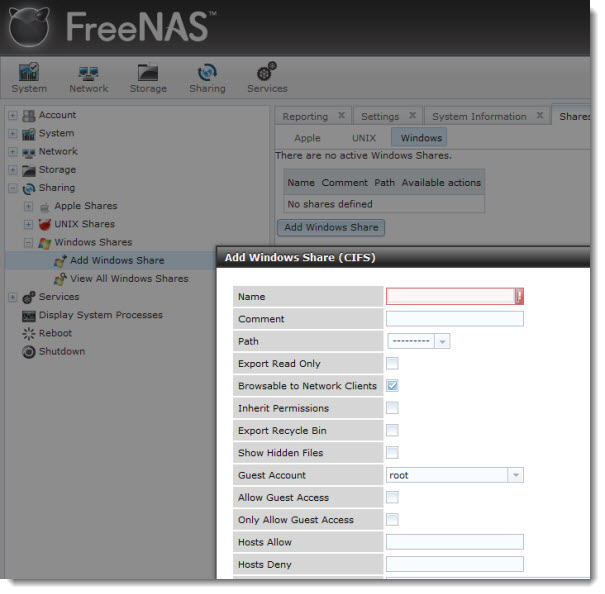
Oh, and if you want to use this NAS box for some windows files or movies, just activate theCIFS share service and Add windows share… that’s it.
The Performances – The navigation through the GUI was much faster than in the previous release, I hope that the results of the performance tests will be so as well…. -:). The installation and configuration is easy. There are some enterprise class features too like being able to configure periodical snapshots of you volume.
I was quite curious to see what’s the performances will looks like. I conducted the same type of performance tests as I did in the 7.2 version. (just the 5 first tests).
To properly format the results when you got the *.CSV file, just go to thehttp://www.vmktree.org/iometer/
So here are the results:
Well, as far as I can see the FreeNAS 7.2 has better performance…

You want to know how to correctly configure a windows share? Read on…
Update:
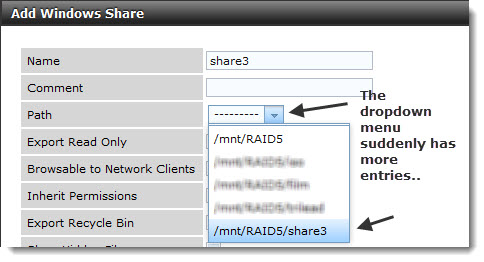
Curiously when wanting to add some Windows shares, a strange stuff happened. If I added for example 2 shares,(share 1 and share2) through the Sharing > Windows Shares menu, the only possibility to specify the path in the drop down menu was the default one which I had: /mnt/RAID5 as on the pic below. Not good. Through share1 I could see any other files and folders presents on the whole volume…..
There were no other entries in the drop down menu, so one cannot enter the correct path there.

In fact to create the windows shares work correctly, you must create a ZFS dataset. Go to the menu Storage > Volumes > Create ZFS dataset.

There you can add the windows share with the proper path like on the picture below… -:).
